Pixelated Art
TLDR This article documents my experimental attempt at creating pixel art animations using AI tools. Through exploring different approaches like ComfyUI, I tried to generate character sprite sheets for a simple running animation. While the results are still preliminary and face several challenges, this experiment provides some insights into combining AI with pixel art creation. The article shares my learning process and the technical workflow I developed, hoping it might be helpful for others interested in similar experiments.

Introduction
I am very accustomed to the style of content created by Alvin Chang on The Pudding, particularly his piece "Teens into Adults." There are two main reasons for this: First, I have a strong appreciation for high-quality pixel art. Second, the content of this work is deeply thought-provoking. For example, the YouTube video version of this piece features a comment stating,
"most teens in 1997 strongly agreed their future would be optimistic" 💀 little did they know….
Therefore, I undertook some technical experiments.
Pixelated
❎pure compression
Pixelation is already a well-established technique, with many projects related to image pixelation available on GitHub. Using pixelate as an example, I will introduce some of the computational details involved.
(function (root) {
  window.URL = window.URL || window.webkitURL || window.mozURL;

  function disableSmoothRendering(ctx) {
    ctx.webkitImageSmoothingEnabled = false;
    ctx.mozImageSmoothingEnabled = false;
    ctx.msImageSmoothingEnabled = false;
    ctx.imageSmoothingEnabled = false;
    return ctx;
  }

  function Pixelate(image, opts) {
    opts = opts || {};
    this.image = image;
    this.setAmount(opts.amount);

    var imageLoaded = function () {
      this.imageUrl = image.src;
      this.width = image.clientWidth;
      this.height = image.clientHeight;

      this.canvas = document.createElement('canvas');
      this.canvas.style.display = 'none';
      this.canvas.width = this.width;
      this.canvas.height = this.height;

      this.canvas.style.cssText =
        'image-rendering: optimizeSpeed;' + // FireFox < 6.0
        'image-rendering: -moz-crisp-edges;' + // FireFox
        'image-rendering: -o-crisp-edges;' + // Opera
        'image-rendering: -webkit-crisp-edges;' + // Chrome
        'image-rendering: crisp-edges;' + // Chrome
        'image-rendering: -webkit-optimize-contrast;' + // Safari
        'image-rendering: pixelated; ' + // Future browsers
        '-ms-interpolation-mode: nearest-neighbor;'; // IE

      this.ctx = this.canvas.getContext('2d');
      this.ctx = disableSmoothRendering(this.ctx);

      this.image.parentNode.appendChild(this.canvas, this.image);
      this.image.onload = null;

      this.pixelImage = new Image();
      this.pixelImage.onload = function () {
        this.ready = true;
        this.render();
      }.bind(this);
      this.pixelImage.src = this.imageUrl;
    }.bind(this);

    if (this.image.complete) {
      imageLoaded();
    }

    this.image.onload = imageLoaded;

    return this;
  }

  Pixelate.prototype.setAmount = function (amount) {
    this.amount = 1 - (amount || 0);
    return this;
  };

  Pixelate.prototype.setWidth = function (width) {
    var height = (this.height / this.width) * width;
    this.width = width;
    this.height = height;
    this.canvas.width = this.width;
    this.canvas.height = this.height;

    this.ctx = disableSmoothRendering(this.ctx);
    return this;
  };

  Pixelate.prototype.render = function () {
    if (!this.ready) return this;
    var w = this.width * (this.amount <= 0 ? 0.01 : this.amount);
    var h = this.height * (this.amount <= 0 ? 0.01 : this.amount);
    // render smaller image
    this.ctx.drawImage(this.pixelImage, 0, 0, w, h);
    // stretch the smaller image
    this.ctx.drawImage(this.canvas, 0, 0, w, h, 0, 0, this.width, this.height);
    this.image.src = this.canvas.toDataURL('image/png');
    return this;
  };

  if (typeof exports !== 'undefined') {
    if (typeof module !== 'undefined' && module.exports) {
      exports = module.exports = Pixelate;
    }
    exports.pixelate = Pixelate;
  } else if (typeof define === 'function' && define.amd) {
    define([], function () {
      return Pixelate;
    });
  } else {
    root.Pixelate = Pixelate;
  }
})(this);
- First, the original image is reduced to a smaller size, controlled by the "amount" parameter.
- Then, this smaller image is resized back to its original dimensions.
- Since image smoothing is disabled, this process results in a pronounced pixel block effect.
- The smaller the image (the smaller the "amount"), the larger the pixel blocks become after resizing, leading to a more pronounced pixelation effect.
The operational logic of this library is quite straightforward. Although it may lose a lot of detail when dealing with images that have complex colors, it is sufficient for simple scenarios.
Common pixel asset sizes in games are 16px, 32px, 64px, and 128px. Here, we choose 128px to generate the corresponding character assets. Given the high resolution of the original image, it actually requires refinement to ensure that various details are more consistent with the pixel art style.

✅ComfyUI
In ComfyUI, one can use shared pixel art workflows available online to generate high-quality results. However, since the images may have slight noise, if further processing or creation is desired, it should be done by using some graphic scripts, someone pixelated custom node,or in image processors like Photoshop to remove the noise.


✅Aseprite + PixelLab
Aseprite is specialized software for pixel art design, while PixelLab is an AI-powered extension of Aseprite. Aseprite is a paid software, and its price is acceptable in my region. Considering my future pixel art projects, I decided to purchase it. PixelLab offers various payment options, but for now, I have opted for the free version for character generation.

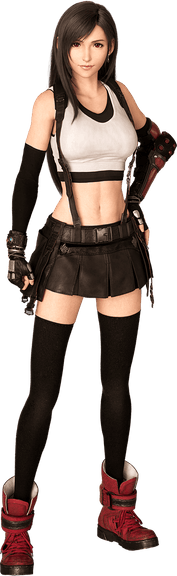
The image below is the result of its creation.
 The created results can be directly used in any project, and with only some simple prompts, they can meet the requirements of many basic scenarios.
Animated
Basics
A skilled pixel artist can quickly create basic 4-directional or 8-directional animation frames based on existing character designs. Here, I will introduce some fundamental concepts.
-
6,12 OR 24 but 4 FPS
 12 FPS is a well-balanced option, offering beginners the advantage of lower costs while still achieving a smooth animation effect that meets expectations.
However, it's important to remember that we are implementing only the basic running motion, which is a completely repetitive activity. Therefore, you can create a 4-frame sprite sheet and repeat it multiple times within one second to achieve a smooth effect.
12 FPS is a well-balanced option, offering beginners the advantage of lower costs while still achieving a smooth animation effect that meets expectations.
However, it's important to remember that we are implementing only the basic running motion, which is a completely repetitive activity. Therefore, you can create a 4-frame sprite sheet and repeat it multiple times within one second to achieve a smooth effect. -
45°
 A 45-degree camera angle is an empirical choice, allowing players to observe the front, side, and top of a character, thereby gaining more visual details. Although this perspective technically violates the laws of physics, most players do not find it jarring.info
For example, in the renowned pixel game "Stardew Valley," you can also see this classic design approach.


-
4-direction OR 8-direction but 1-direction
Typically, pixel characters require 4-directional or 8-directional movement animations when moving. However, for the visual work mentioned in this text, implementing a single direction is sufficient, significantly reducing the workload needed.
You can observe that most movement is left/right, and since left and right are essentially mirror images, the limited movement in the vertical direction means that we only need to implement horizontal (X-axis) movement animations. The vertical movement can then be achieved simply by shifting the position.
Alright, the good news is that we only need to draw four frames. However, the bad news is that I am not at all familiar with animation and pixel art. However, this is the age of AI, isn't it? After some research, I discovered the following methods:
-
❎Upload a 2D pixel image to be converted into a 3D model using AI. By combining it with free running skeleton animations in Unity and through recording and processing, the desired sprite sheet can be obtained.
After some experimentation, I found that its modeling effects are not well-suited for pixel art. To achieve a good result, you must have very clear images of each part of the body.
-
❎Utilize existing pixel AI tools such as PixelLab.
Although PixelLab provides everything I need, its skeletal animation features are paid services aimed at professional pixel artists. Since I only intend to conduct a single test, I might consider avoiding this expense for now and purchase it later when there's a more intensive demand for work.
-
✅Upload a 2D pixel image, find pre-existing skeleton animation screenshots, and directly generate the sprite sheet using ComfyUI.
 It seems that this is probably the most suitable method for me at the moment—it's free, allows control over movements, and results in minimal precision loss
Other pixel animation tools
Run Cycles
The running motion of a character has a specialized term known as RunCycle. This refers to the requirement that a single running action should be complete and closed-loop, especially in gaming and 3D fields. This means that the end of one action should seamlessly connect to the beginning of the next action, creating a loop for smooth running animation.
Thanks to the sharing within the 2D pixel art community, we can easily find related guidance schemes:

Generate
Based on the aforementioned materials, I found relevant resources and tutorials in the ComfyUI open-source community, which saved me a lot of time.
-
Excellent running skeletal animation

-
A guide highly aligned with my objectives
-
A comprehensive beginner's guide to ComfyUI
Ultimately, I constructed the workflow as illustrated:
- Utilize IPAdapter to maintain character features
- Employ ControlNet to apply the pose of each frame in the sprite sheet
- Select checkpoints tailored for pixel art-specific models
After a simple attempt, I obtained the following results:

However, there are still some issues:
- The character images generated by the diffusion model differ from the original character.
This is likely an issue with parameter tuning. Adjustments to the IPAdapter parameters are necessary, or Flux could be introduced to strictly maintain character consistency.
- The generated images only simulate a pixel style and are not strictly pixel art, leading to similar noise issues as before.
Dedicated pixel art processing nodes need to be introduced to eliminate the corresponding noise.
- The motion transitions are not smooth enough, and there is still a stuttering sensation during running.
This remains a challenge due to the inherent randomness of diffusion models (even with convergence algorithms), making it difficult to ensure natural transitions between frames. It requires introducing unique pixel art optimization techniques, such as smudging. As seen in PixelLab's promotional videos, their animations are relatively smooth, which necessitates a deeper mastery of ComfyUI on my part. For now, I'll temporarily put these issues on hold.
Improvement
-
For issues related to non-strict pixels, I referred to the code from https://github.com/Astropulse/sd-palettize and implemented a custom node in ComfyUI to handle non-strict pixel problems in 512*512 results.
-
For the issue of unsmooth motion, I used a pose sprite sheet with smaller frame divisions from the Civitai community: https://civitai.com/models/56307/character-walking-and-running-animation-poses-8-directions.

However, there is still the problem of losing character details (such as swinging hair while running). I believe the root cause lies in the fact that pixel art inherently loses precision, and in diffusion generation, it is unavoidable to incorrectly process some pixel blocks.

Next steps to consider (pending execution):
- Refer to the complete process in https://civitai.com/models/448101/sprite-sheet-maker, first generate a sprite sheet from high-resolution images, and then use a pixelation script to process the images. However, this requires that the high-resolution images are well-suited for pixel art. From the first point in the pixelation method mentioned above, we already know that directly converting high-resolution images into pixel art using algorithms is almost unusable.

- Attempt to use FaceID for detailed facial features of characters and AnimateDiff for frame interpolation to mitigate the issue of losing character details.
3D render 2D
Recently, I came across a video on YouTube. I was amazed by the smoothness of its animation, as it also used sequential frame patterns. So I decided to study it further.
base case
The following are the detailed steps of his process:
-
Use ControlNet to generate a 2D character in a T-pose.


-
Convert it to a 3D model using tripoSR. Even though the precision is low, it doesn't matter, as this will be less noticeable during the final pixelation stage.
-
Export the model in .fbx format using
Blender. -
Upload the model to
Mixamo, perform auto-rigging, and select and apply a running animation model.
-
Load the .fbx model with the running animation in Blender and render the sequential frames from a specific camera angle.
-
Use SD to pixelate the sequential frames. I added pixelate to convert it into true pixel.
-
Use FFmpeg to export a GIF.
Although the smoothness and character consistency are quite impressive, it remains merely a product of a simple compression algorithm; it is pixelated, but not pixel art. Thus, there are currently two technical challenges:
- When using SD's ControlNet to apply poses, it struggles to maintain character consistency, especially in small pixel areas.
- There is a lack of a model/algorithm for converting all task images into pixel art.
I hope that one day I can find solutions to these issues.
another with some improvement
-
Select a female anime model from posemy.art and apply a T-pose to obtain high-quality DWopenpose and Depth original images.


However, the Depth image seems to lack depth information, so I regenerated it in ComfyUI using MiDaS Depth(Left) and Zoe Depth(Right), and ultimately chose the MiDaS Depth, which appears cleaner


-
Dual ControlNet using both openpose and Depth was employed to ensure the accuracy of the pose.

-
Use the latest Tripo V2.5 for 3D modeling.
The model can be made more precise by using the four-directional views of the character. However, since I'm only conducting a basic test, I'll omit this step for now.
-
Use pixel art add-on in blender instead of pixelate custom node in ComfyUI.

So, that is the result: